The last milestone had you learn about what fun is, and how to design and build up a game idea from scratch. For your next milestone, you are going to be exposed to the Unity engine editor, which is the platform you will be using to make games throughout the year. You will download and install the editor, and start to get a grasp on how to control the platform. You will also start to learn some basic scripting techniques to start making interactive video game content. Push through this milestone, and you will have a strong foundation to start designing and programming your own video games.
Goals
To complete this milestone, you should be able to demonstrate the following skills:
Install the Unity editor and create new projects
Navigate and utilize the Unity editor
Create and edit scenes
Add primitive objects
Translate, rotate, and scale objects within the editor
Add components to gameobjects
Prefabs
Physics systems
Create interaction with basic C# scripting
GameObjects, Transforms, and Vectors
Variables
Start and Update events
IDE literacy
Import and apply visual and auditory effects
Materials
Importing 3D models
Sound effects
This milestone is a foundation – while there are a lot of topics discussed, you will only get a brief overview during this module. Future modules will begin to delve deeper into each of these topics.
Learning Objectives
Standard
Description
3A-DA-09
– Students will translate between data representations, specifically converting vectors to positions in the game world.
3A-DA-11
– Students will be tasked with creating an interactive game for entertainment purposes. – Students will visualize a game idea through the medium of a Unity application.
3A-AP-13
– Students will prototype a video game using the skills gained throughout the milestone.
3A-AP-19
– Students will use iterative design and feedback from themselves and their peers to improve their games.
A full list of standards compiled by Unity (aligned with ISTA and other Unity credentials) can be found here.
Content
From here on out, we are primarily going to be using Unity Learn (link) for educational materials. This is Unity’s official tutorial platform and a great learning resource. Note that you may need to make an account to use the platform, but it is totally free. You can also gain badges and credentials to potentially add to your resume later!
For milestone 2, you should work through the Unity Essentials pathway (link). The pathway will take you through everything, from installing Unity, to getting started using the editor. It also goes through the basics of coding, which will be vital for later. Make your way through the recommended materials (and the optional materials if you have time), and then test your knowledge with the milestone project.
Recommended
Mission 1: Get Started with Unity
Mission 2: Explore Unity
Optional
Mission 3: Learn Unity
Milestone Project – “Mini” Golf
A GIF recording of an example level in the game. The player is about to win.
For this milestone, your final task will be to make a mini golf game. Though, it’s not really mini in our case…
The goal of the game is to kick the soccer ball into the flag with the least number of kicks possible. It might sound easy now, but it’s up to you, as the game developer, to design levels which test the skill and challenge your players. Once you complete this task, you will be experienced enough to start tackling more advanced Unity features, specifically more programming.
As a reminder, you can work individually or form teams for this, and future milestones. Do whatever you’re most comfortable with at this point. Just remember, you will likely be working with a team for competition in the spring!
If you need help working through this milestone, and the hints provided aren’t helpful, please reach out to to the Innovate-IT email address. We can help you with more personalized feedback and questions as needed.
Task 1: Download and Open the Unity Project
NOTE: There could potentially be a version mismatch when you download this Unity project to work on it. If Unity gives you a warning about a version mismatch, just open the project anyways with whatever version you have installed. For these projects, we aren’t doing anything which would break if you use a different version of Unity.
To complete this milestone project, you will need to download some starter assets we created to guide you. They are located on our resources page, under the milestone 2 heading. Assets are provided as a zip file, containing an entire project inside. Extract “Not Mini Golf” from the file, and save it in a location which is convenient to you. Once extracted, you should be able to open the root folder “Not Mini Golf” with Unity Hub (Hub > Open > Folder), and open the project in the Unity editor.
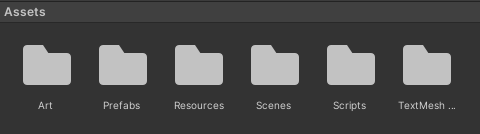
If you successfully opened the project, you should have the following asset structure:
Task 2: Build a Level
There should be a single scene in the “Scenes” directory of your project, titled “Level 1”. Open this scene, as this will be where you create your first level. It should initially be a partially empty scene, containing only a player, ball, and a walled in area.
You are required to have a few elements for a “valid” level:
Player (the thing you move around)
Hole/Flag (the flag which you need to kick the ball into)
Ball (the soccer ball you kick around)
In addition to the required parts of a level, you can (and should) add in some other obstacles and decorations to make the level more interesting.
Trees
Bushes
Windmills
Barriers
All of the required, and decorative elements are located in the prefabs folder (Assets > Prefabs). While you can only have one player, you can technically have as much of whatever else you’d like. Your task is now to build a level using the elements given to you. Try to make the level exciting, challenging, and beautiful with the items you are given. It might help to draw out an idea before you start moving things in Unity!
You should also make some materials for your scene. Color the trees, walls, player, and any other obstacle whatever you’d like. Try to be creative in the theming for your game. If you’d rather edit the current materials, they are located in the materials folder (Assets > Art > Materials).
Checklist:
Does your level have a player, ball, and hole/flag?
Do you have some obstacles in your level? (Trees, bushes, walls, windmills)
Did you adjust your color scheme?
Task 3: Implement Ball Respawn
Currently, the ball will always spawn (or respawn) at the center of the map. This is kind of boring, as the player will play the exact same level every time. Instead, we could automatically “mix up” the level by spawning the ball in a random location each time the level is loaded.
A respawn function named “RandomRespawn” is located in the Ball class (Assets > Scripts > Ball.cs). Your task is to implement the random placement of the ball when this function is called. To do this, assign a random position value to the “randomSpawnPos” variable inside of the “RandomRespawn” function. The ball should be spawned anywhere within (-24, 24) on either the X or Z axis (see comment in the function for more detail).
[su_spoiler title=”Hint 1″ open=”no” style=”fancy”] We need to spawn the ball somewhere inside of a square. What would the possible “bounds” for the ball be? Reread the task 3 text if you don’t know the bounds. [/su_spoiler]
[su_spoiler title=”Hint 2″ open=”no” style=”fancy”] Does Unity offer any function to pick a random number between two numbers? [/su_spoiler]
[su_spoiler title=”Hint 3″ open=”no” style=”fancy”] You can use Random.Range() (https://docs.unity3d.com/ScriptReference/Random.Range.html) to generate random numbers. How can you use this function to generate a random position? [/su_spoiler]
[su_spoiler title=”Hint 4″ open=”no” style=”fancy”] You should generate a random number for both the X and Z coordinate of the “randomSpawnPos” variable. [/su_spoiler]
[su_spoiler title=”Hint 5″ open=”no” style=”fancy”] Your final line should be:
Vector3 randomSpawnPos = new Vector3(Random.Range(-24, 24), 2, Random.Range(-24, 24));
[/su_spoiler]
Task 4: Implement the Windmill
A windmill is an exciting part of any mini golf course. However, as it stands now, our windmill is kind of boring – it doesn’t spin! Your next task is to implement the code needed to make the windmill spin. This will add an interesting obstacle to our game, and add a little more excitement and movement into the level. The windmill code (Windmill.cs) is located in the Scripts folder (Assets > Scripts > Windmill.cs). Currently, the C# file should contain a few variables, and an empty update function.
It’s up to you to figure out how to rotate the windmill for this task. The “pivot” variable holds the “transform” which you need to rotate to rotate the windmill. The “RotationSpeed” variable holds the speed at which the windmill should rotate. Using the update functions and the variables provided, implement the windmill’s rotation.
[su_spoiler title=”Hint 1″ open=”no” style=”fancy”] You should take a look at the documentation for the “Rotate” function: https://docs.unity3d.com/ScriptReference/Transform.Rotate.html . We’re using the “axis, angle” version of the function. [/su_spoiler]
[su_spoiler title=”Hint 2″ open=”no” style=”fancy”] What should the axis of rotation be? There are helpful “direction” operators for situations like this (Vector3.forward, Vector3.backward, Vector3.left, Vector3.right, Vector3.up, Vector3.down). [/su_spoiler]
[su_spoiler title=”Hint 3″ open=”no” style=”fancy”] What should the angle of rotation be? You have a variable you can use, RotationSpeed, to figure this out. [/su_spoiler]
[su_spoiler title=”Hint 4″ open=”no” style=”fancy”] The completed line should be:
Pivot.Rotate(Vector3.forward, RotationSpeed * Time.deltaTime);
[/su_spoiler]
Task 5: Implement Scoring
For the player to actually have feedback while they play the game, we need to keep track of the number of times they’ve kicked the ball. This is handled by a script we haven’t seen yet, called the “Game Manager”. The game manager is responsible for keeping track of score, displaying the current score, and resetting the level once the ball hits the flag.
Your task is to complete the “IncrementBallCounter” function on line 18 of the GameManager script (Assets > Scripts > GameManager.cs). Currently, the function only has a single line for displaying the number of points on the screen. You need to implement the actual functionality of the procedure. Complete the function by adding a line to increment “points” by “pointsToAdd”.
[su_spoiler title=”Hint 1″ open=”no” style=”fancy”] How do you add two numbers together in C#? [/su_spoiler]
[su_spoiler title=”Hint 2″ open=”no” style=”fancy”] Is it possible to add two numbers together (current points and pointsToAdd) and store them in the points variable? Try working through a couple of examples on a piece of paper. [/su_spoiler]
[su_spoiler title=”Hint 3″ open=”no” style=”fancy”] Points needs to get the value of points + pointsToAdd. [/su_spoiler]
[su_spoiler title=”Hint 4″ open=”no” style=”fancy”] The final line should be:
points = points + pointsToAdd;
You can also write this shorthand with:
points += pointsToAdd;
[/su_spoiler]
Task 6: Final Tweaks
With that, your code has been implemented, and the game should be fully functional. Well done getting this far.
Now comes the final part of any game design process – balancing, tweaking, and iteration. At this stage, it’s up to you to clean, and tweak the game to make it more fun. You have several places where you could potentially tweak your game to make it more entertaining:
Edit the properties on the “Player” component on the Player gameObject. Should the player move faster, turn faster, or kick harder? This is up to you.
Edit the properties on the Ball’s rigidbody object. Should the ball have more or less friction? Should the ball be heavier?
Edit colors and materials. Is anything hard to see? Do you want to change the color scheme of the game?
Do you have a windmill? Maybe the blades should move faster, or slower, depending on the level you made.
Is your level too hard? Too easy? Move, add, or remove obstacles to change things up!
Task 7: Sharing and Playtesting
Now you can finally share the cool project you’ve worked on. Find someone (fellow student, teacher, parent, whoever) and talk to them about your game. Let them try it out! Talk to them about why you made the design choices you did, and what your vision for the game is. Maybe they even have some feedback to help make your game better.
Congratulations! If you’ve made it this far, you’ve successfully completed Milestone 2. You’ve now gained the baseline knowledge needed to design levels in Unity, and start thinking about how to design a fun, interactive experience. While this milestone focused on using Unity, the next few milestones will start to help you think about coding, and how to implement more complex behavior. Best of luck in Milestone 3!